Diving Warheads

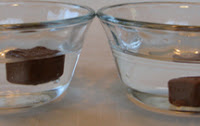
Does a Warhead sink? Or does it float? This candy experiment shows you how to make a Warhead do both when you make a Cartesian diver candy experiment.
What you need:
  • small plastic bottle of water
  • wrapped Warheads candies(don't unwrap!)

What to do:
  1. Open a bottle of water and push the wrapped Warhead inside.
  2. Make sure the Warhead floats. If you put it in the bottle and it sinks immediately, try another one. (Some Warhead packages don't contain enough air to float.)
  3. Fill the bottle completely full, so that there are no air bubbles at the top. Any extra air bubbles will make the Warhead harder to sink.
  4. Screw the bottle cap on tightly, or you'll send water shooting everywhere.
  5. Squeeze the bottle and see if you can make the Warhead sink!

What's happening:
Warheads sink. Air bubbles float. A Warhead inside an airtight wrapper does both...if you squeeze it hard enough to compress the air bubble. This makes the candy wrapper package denser than the water, and it sinks. But if you release the bottle, the bubble expands and the candy floats again!

This science demonstration is called a Cartesian diver, named after French philosopher and scientist René Descartes. You can also try making a Cartesian diver with ketchup packets, eyedroppers, or other items that trap air bubbles.

As featured in Scout Life magazine

From the book Candy Experiments 2 by Loralee Leavitt

Acid Test

This experiment was invented by Loralee Leavitt.  Please do not copy, sell, post, publish, or distribute all or any part of this material without my permission. Instead, feel free to link to this website, and to contact me with questions.


Sour taste is the body's way of identifying acid, so if your candy tastes sour, it contains acid.
Pixy Stix acid test:
adding baking soda causes bubbles

To test for acid yourself, try this:

What you need:

  • Fruit-flavored or sour candy, such as LemonHeads, Nerds, WARHEADS, or sour gummy candy
  • Baking soda
What to do:
  1. Dissolve the candy in a small amount of warm water (about a half-cup or less). For hard candy like Smarties, you may want to crush it first to make it dissolve faster.
  2. Sprinkle a spoonful of baking soda into water.
  3. Watch for bubbles.  If it bubbles, the candy is acidic.
What's happening: 
When you dissolve acidic candy in water and add baking soda, the reaction produces carbon dioxide gas.  This is what makes the bubbles.

For more fun, try testing candy like Skittles, StarBursts, or Sweet Tarts.  Do these candies contain as much acid as really sour candies?

*If the candy is taking too long to dissolve, try crushing it first.  You can also get quick results using Pixy Stix or candy covered by sour powder.


Video results: watch acid tests on Youtube
Explanation based on author's interview with Walter Bowyer, chemistry professor at Hobart and William Smith Colleges


From the book Candy Experiments by Loralee Leavitt

Chocolate Bloom

Please do not copy, sell, post, publish, or distribute all or any part of this material without the author's permission. Instead, feel free to link to this website, and to contact me with questions.

Chocolate is made of cocoa butter, cocoa solids, and other ingredients that have been mixed together.    Can you take them apart?

Chocolate after several weeks in a warm car
What you need:
  • Chocolate candy (dark works better)
  • Heat
What to do:
  1. Heat your chocolate in a sunny windowsill, with a hair dryer, in a microwave, or in a low oven, until it starts to melt.  (Chocolate melts fast--if it doesn't look melted, poke it to check.)
  2. Let it cool overnight or in the refrigerator.
  3. Repeat these steps until you see light brown spots or streaks.  (This may take several heating attempts.)
What's happening:
When the chocolate heats and cools, some of the fat pushes out past the solid particles and forms into white crystals.  This causes the light spots and streaks, which are known as chocolate bloom.*


*See Becket, S. T.  The Science of Chocolate, 2nd Edition.  The Royal Society of Chemistry: Cambridge, UK. 2008, pg 103, 109, 116-117

From the book Candy Experiments by Loralee Leavitt

Color Separation (Chromatography)


Please do not copy, sell, post, publish, or distribute all or any part of this material without the author's permission. Instead, feel free to link to this website, and to contact me with questions.

You know candy is colored with artificial dye.  But did you know that many candies contain several kinds of dye?  To see the different dyes for yourself, try this.


M&M chromatography.  Brown has separated into the most colors (right).
What you need:
  • A rectangle of coffee filter paper
  • Dyed candy such as M&Ms, Skittles, or Reese's Pieces
  • A glass filled with a half-inch of water
  • A pencil
What to do:
  1. Place drops of water on a flat surface, such as a plate, a cookie sheet, or tinfoil.
  2. Place candy on water and let color dissolve.
  3. Crease the coffee filter paper vertically (to help it stand up). 
  4. Dab or paint a drop of candy-colored water onto the paper, an inch from the bottom.  If you're testing several colors, label each with pencil.
  5. Stand the paper up in the glass of water, with the water level below the color splotch.  (If the paper doesn't stand, check here for tips on folding or clipping the paper in place.)
  6. Watch the water seep up to the top edge of the paper.

What's happening:
When water seeps up the filter paper, it separates the different colors so you can see them.  M&M brown works especially well--the different dyes separate out into a rainbow. 

You can try this experiment with anything that contains dye, including juice, markers, or ballpoint pen (that’s why it’s better to mark your labels with pencil). 


Explanation based on author's interview with Walter Bowyer, chemistry professor at Hobart and William Smith Colleges

From the book Candy Experiments by Loralee Leavitt

Density Rainbow

This experiment was created by Loralee Leavitt. Please do not copy, sell, post, publish, or distribute all or any part of this material without my permission. Instead, feel free to link to this website, and to contact me with questions.

Sugar water is denser than water--the more sugar, the denser. This experiment shows you how to layer different densities into a rainbow of color. Try it with Skittles (advanced) or Nerds (easier).

Pouring a Skittles Density Rainbow. (The entire process took about four minutes.)

Skittles Method
What you need:

  • Five small cups for mixing
  • A clear glass
  • A wide spoon
  • Skittles
  • 2 red
  • 4 orange
  • 6 yellow
  • 8 green
  • 10 purple


To do:

  1. Fill five cups with 2 Tbsp of water each.
  2. Dissolve the Skittles, each color in a separate cup. If the candy is not dissolving, stir frequently or heat the water. (The waxy film floating on the surface can be removed or ignored; it won't affect the experiment.)
  3. Pour the purple water into the clear glass.
  4. Hold the spoon upside-down over the purple water, with the tip of the spoon touching the edge of the bowl above the waterline. Slowly pour the green water down the back of the spoon, so that the green water does not mix in with the purple. Instead, it should float on top.

    Alternative method: use a small syringe to make the layers. Suction up the green water, hold the tip of the syringe against the edge of the glass, and gently squeeze the water out to make the layer.)
  5. Repeat with the other colors, and admire your rainbow.


Nerds Method
Fill four cups each with 1/4 cup warm water. Dissolve 1 teaspoon red Nerds, 2 teaspoons orange Nerds, 3 teaspoons yellow Nerds, and four teaspoons green Nerds (or whatever colors you like). Pour the rainbow as above.

What’s happening:
Since the water with less candy is less dense, it floats on top of the denser layer like oil on water. Unlike oil and water, your sugar water layers will eventually mix together, muddying the color. So admire it while it lasts!

From the book Candy Experiments by Loralee Leavitt

Dissolving Hot/Cold


Please do not copy, sell, post, publish, or distribute all or any part of this material without the author's permission. Instead, feel free to link to this website, and to contact me with questions.

See if candy dissolves faster in hot or cold water.

Red Skittles in hot water dissolve faster 
than orange Skittles in ice water
What you need:
  • Identical pieces of candy
  • Hot and cold water
  • Cups
What to do:
  1. Fill one cup with hot tap water and one with cold water (for better results, add ice cubes).
  2. Put one candy in the hot cup and one in the cold cup.
  3. Watch to see which dissolves faster.
What’s happening:
Because molecules move faster when it’s hot, the candy in hot water dissolves much faster.  The candy in ice water might take all night to dissolve.

With chocolate, the difference is even more impressive.  Since the cocoa butter in chocolate doesn't dissolve in water, chocolate placed in cold water just sits there.  But chocolate in hot water melts and mixes with the water.

From the book Candy Experiments by Loralee Leavitt

Find Hidden Candy

How much "candy" is in the food you eat?

This 20 oz. bottle of orange soda contains 84 grams of sugar.  
Drinking the soda would be like eating all the candy on the scale.

Most candy is made from sugar, corn syrup, and flavorings.  These same ingredients are used to sweeten lots of different kinds of foods.
Can you find the "hidden candy" in other food you eat?

What you need:

  • Sweet food with ingredient label, such as fruit-flavored drink, soda pop, fruit snacks, or yogurt
  • Candy made mostly from sugar, such as mint Life Savers, Altoids, or Smarties
  • Kitchen scale

What to do:

  1. Check the label to find out how much sugar your sweet food contains.
  2. Weigh candy on the kitchen scale until it matches the weight of the sugar.
  3. Eating your sweet food would be like eating that much candy.
What you see:
Some snacks are really candy in disguise, such as fruit snacks made of corn syrup, sugar, flavorings, and gelatin--the same ingredients as gummy bears. 

Other popular foods have "hidden candy."  For instance, one fruit-flavored brand of yogurt has 28 grams extra sugar--as much as five mint Life Savers plus four Altoids.


From the book Candy Experiments by Loralee Leavitt

Please do not copy, sell, post, publish, or distribute all or any part of this material without the author's permission. Instead, feel free to link to this website, and to contact me with questions.

Floating M's and S's


M&Ms and Skittles sink in water--mostly.  To see what floats, try this.
Floating S from dissolved Skittles
What you need:
  • Cup of water
  • M&Ms or Skittles
What to do:
  1. Drop the M&Ms or Skittles in the water, letter side up.
  2. After a few minutes, look for floating letters.  (Do not stir the water--you might break the letters.)
What's happening:
The white letters on M&Ms and Skittles are printed with edible ink that doesn't dissolve in water.  When the rest of the candy shell dissolves, the letters peel off and float. Some of the letters break into pieces, but a few should survive intact.


Find a Floating Letters worksheet by Science Gal here!

From the book Candy Experiments by Loralee Leavitt

This experiment was invented by Loralee Leavitt. Please do not copy, sell, post, publish, or distribute all or any part of this material without my permission. Instead, feel free to link to this website, and to contact me with questions.

Livesaver Lights

Can you make Lifesavers flash in the dark?

Breaking Lifesavers makes flashes of light

What you need:
  • A dark room with a mirror
  • Wintergreen Lifesavers
What to do:
  1. Stand in the dark room facing the mirror.  (If you don't have a mirror, get a partner and watch each other.)
  2. Chew a Lifesaver with your mouth open.
  3. Look for flashes of light.
What's happening:
When you crunch the candy, electrons get ripped off of the sugar molecules. When they recombine with the sugar molecules, these electrons emit light.  The wintergreen oil used for flavoring makes the light more visible.*  

*For more information, see "Lightning In Your Mouth" on the Exploratorium website.  You can also find a complete explanation of this reaction in Sweeting, Linda M, "Light Your Candy,"  Chem Matters, Oct 1990, pp 10-12.

From the book Candy Experiments by Loralee Leavitt

Oil Test


This experiment was invented by Loralee Leavitt. Please do not copy, sell, post, publish, or distribute all or any part of this material without the author's permission. Instead, feel free to link to this website, and to contact me with questions.

If you thought your candy was all sugar, think again.  Many chewy candies also contain oil. 

Waxy oil spots on a melted, cooled Starburst

To see the oil for yourself, try this:

What you need:

  • Starburst
  • Microwave
  • Microwaveable plate
What to do:
  1. Unwrap the Starburst and place it on the plate.
  2. Microwave the Starburst until it turns liquid and bubbly, about one minute (depending on your microwave).  Watch to make sure you don't heat the candy too long and burn it.  Caution--HOT!
  3. As the Starburst cools, look for shiny spots on top.  This is the melted oil. 
  4. When it's completely cool, the oil will harden into whitish spots (like wax). Scrape them off and rub them between your fingers to feel the oil.
What's happening:
Starburst candy contains almost 10% hydrogenated palm kernel oil.  When you microwave it, the oil melts and separates from the sugar.


From the book Candy Experiments by Loralee Leavitt

Pop Rocks


Pop Rocks snap and explode when you taste them. What's the secret ingredient in Pop Rocks?"

What you need:
  • Pop Rocks
  • glass of water
What to do:
  1. Dump the Pop Rocks in water.
  2. Watch for bubbles.
What's happening:
Like soda pop, Pop Rocks contain bubbles of carbon dioxide gas.*  When the candy dissolves, the gas escapes and forms bubbles.


*See the official POP ROCKS website.

From the book Candy Experiments by Loralee Leavitt

Please do not copy, sell, post, publish, or distribute all or any part of this material without the author's permission. Instead, feel free to link to this website, and to contact me with questions.

Sink/Float

Most candy sinks in water, because sugar is denser than water.  But some candy floats.  Why?
One candy bar floats; one sinks.

What you need:
  • Different kinds of candy, such as chocolates, sugar candy, 3 Musketeers bar, Kit Kat bar
  • water
What to do:
  1. Drop the candy in the water.
  2. Watch what happens: does it sink or float?
  3. If you have a 3 Musketeers bar, poke it to break the chocolate shell.  Do you see bubbles escaping?
What’s happening:
Some kinds of candy, such as Kit Kats, 3 Musketeers, and marshmallows have air trapped inside.  This makes them float. 


From the book Candy Experiments by Loralee Leavitt

Please do not copy, sell, post, publish, or distribute all or any part of this material without the author's permission. Instead, feel free to link to this website, and to contact me with questions.

Sticky

You knew candy was sticky--how sticky can you make it?

Candy car made from Laffy Taffy and Smarties

What you need:
  • Several blocks of chewy candy such as Starburst, Taffy, Laffy Taffy
  • Small round candies such as Smarties or Sweet Tarts
What to do:
  1. Wet and knead each chewy candy until it is pliable.
  2. Try to attach round candy wheels. 
  3. The candy that builds the best car is the stickiest candy.
What’s happening:
Several factors affect candy stickiness, including how warm it is, how wet it is, and how much oil it contains.

From the book Candy Experiments by Loralee Leavitt

Please do not copy, sell, post, publish, or distribute all or any part of this material without the author's permission. Instead, feel free to link to this website, and to contact me with questions.